StyleSkier.com Style Skier
If you have come across this website and are also wondering: “Does this person know anything about patio cover or how to build one? Can you have one? Can I let you know firsthand that I have it? This article is about my experience building my patio cover – a pergola-style patio cap, to be precise.
You should be serious about building your patio reward or you won’t be looking for information on the internet. For those who have some fantastic skills (and equipment), you will likely soon be able to tackle the profession. Just make sure you plan this into the planning and prep time. A couple of friends wouldn’t help with the heavy lifting.
You have friends who prefer to build something that patio cover won’t hurt. I dare say they will make your life easier. You need support to be safer at work.
I honestly don’t remember the website I moved to when I first searched for “patio cover” or even “pergola style patio caps” which is where I got my basic plans. Now that you’ve gathered your ideas (this is as simple as taking a photo of this one that you might prefer to build – I did) you can also make a list of materials. After doing my research, I decided on items with slightly larger dimensions (4 × 6) and 4 × 8 bars. I chose to use 2x8s for the lamellar or grid bits that will be used for your shadow element. Those were maybe 2x10s, but I didn’t want to pay a lot of money or just had to choose how to mount them.
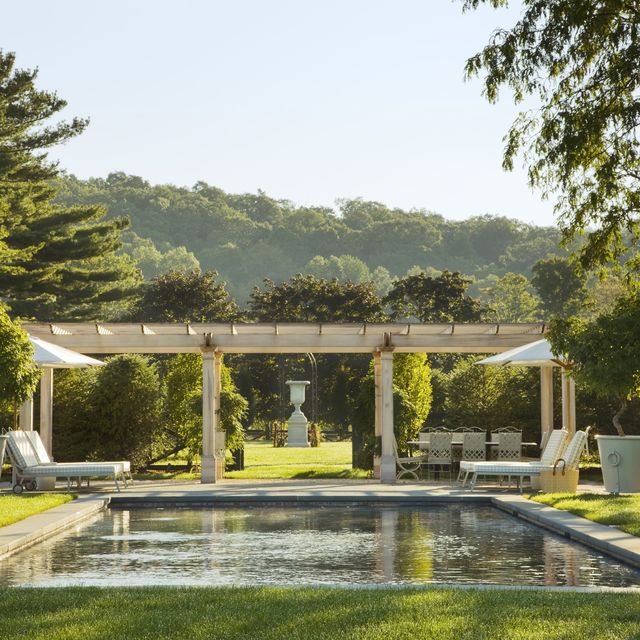
Outside in southwest Arizona, such terraces are standard and offer plenty of shade in the months when it is cozy outside. The basic belief of a pergola is that the louvre bits (my 2x8s, can also be bar-like and use 4x4s or even 3x3s) provide a grid shape that blocks the angle of sunlight.
I find the larger lumber in the easy-to-buy 4x4s from local hardware stores because that larger lumber had a remarkable and beautiful appearance for it. It’s all about your tastes in terms of the way you want your patio cap to be present.
Along with my job, I decided to pour foundations and place pre-made brackets that I bought at my local hardware store while he was being treated. The articles of my pergola were placed on these brackets after it was fully healed. The patio deck was made from brick so I had a more stable foundation for my items. For those who have already pumped a plate or are likely to take this course, you can also purchase brackets that can be mounted into the piece with anchor bolts drilled into the item. By the way, I had to add the condition that I also read that patio coverings mounted in this way would remain flat and plumb for more.
Together with all the plants and lamellas, it is not noticeable. However, I think it needless to say. Be sure to draw all of your measurements in one place to keep everything authentic.
When I knew my foundations were dug in the ideal spot outside, I pressed the cement and set the brackets. It may take a little trial and error to determine the exact ways to find the mounts for sitting. I think my mix may have been a bit sparse. It was a fantastic idea and I recommend it. Then another cold drink and wait until another weekend has started with the other of my new terrace cap structure.
The next thing was the assembly of this pergola. All of my wood has been cut to size for your large part. I roughly cut the items so I could really get some work done once I had a sterile foundation that probably wouldn’t change my measurements. Consoles can also be used for contacting and anchoring the articles on the head carriers. I decided to make my own (happened to understand how to weld). Perhaps not a necessary measure, but it does add a bespoke zinc-plated zinc bracket appeal to your do-it-yourself store.
After spending a lot of energy getting the items (catchy little bastards for your newcomer) we put carriage bolts on the brackets and were ready to attach the joists. But I made sure that the posts were trimmed to the exact same height. After this operation, the items kept doing business and the remainder of the decking work could go more smoothly. Now all of the weight could rest on the articles. The only heavy lifting would be the beams.
The custom made mounts slide over the tops of their items and I used lag screws to secure them in place. The bars fell straight out of the channels I made. Finally a simple measure within this pergola company! I chose to notch my joists or battens; hence the cover in my patio eases my height restrictions in the HOA regulations for patio coverings. Argh! In the long run, the height was measured at about two feet. In addition, the battens could not give the beams any additional stability. All of this was only attracted by the beams and I look forward to the flowers and plants that I can cultivate in them today and provide this precious shade – not to say hiding all these small imperfections.